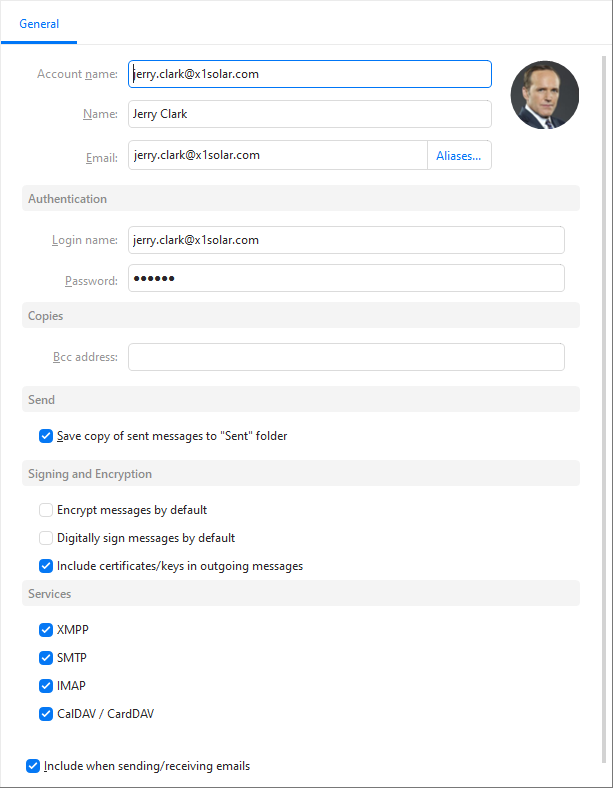
In the Account name field, enter a label for the account. It will not appear on your outgoing emails, and is useful if you have multiple accounts.
In the Name field, enter the name which will be displayed in your outgoing emails and will be seen by their recipients.
In the Email field, enter your email address.
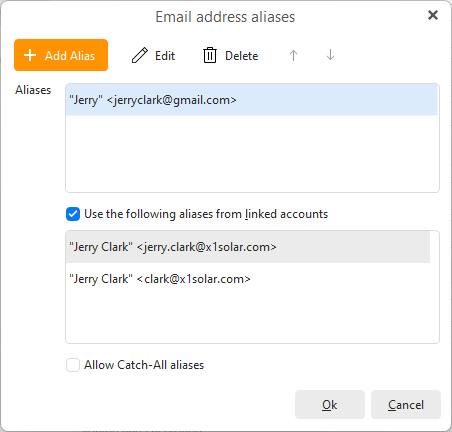
Click Aliases.. to manage both your server-set aliases or to manually add those that this account can use. You will then be able to select these aliases as a From email address.
+Add Alias button alows you to connect other aliases from other services or set just the ones you plan to use and uncheck the option Use the following aliases from linked accounts, which is a list of aliases synchronized from the server.
In the Login name, enter your login name for that account.
In the Password, enter your password for that account.
Note: Accounts set up using oAuth authentication (via external window) will not have the Authentication section available, as a secure login token is used instead of actual username and password.
The Copies field you can set Bcc email address to automatically make blind copies of your messages - the actual recipients in the To and Cc fields will not see this copy.
In the Send field you can decide if you want to save a copy of sent messages for this account in Sent folder or not.
Signing and Encryption is for custom settings of your PGP or S/MIME encryption of this account - you can also change this setting in Account policies.
For accounts without native Calendar, Contact and Task services, meaning you only have the Mail service available, you will be able to set Default Folders. Select folder for incoming scheduling messages, taska and contacts by clicking on Select... button and choosing your preferred folder.
Under Services you can disable or enable any of the available services for a given account. For the default account you will not be able to disable incoming and outgoing mail service, as the default needs to have both to work correctly.
The box "Include when sending/receiving mails" is checked by default, you can uncheck it to temporarily stop using the account (though IMAP and EWS messages will still update when the server sends any new information).
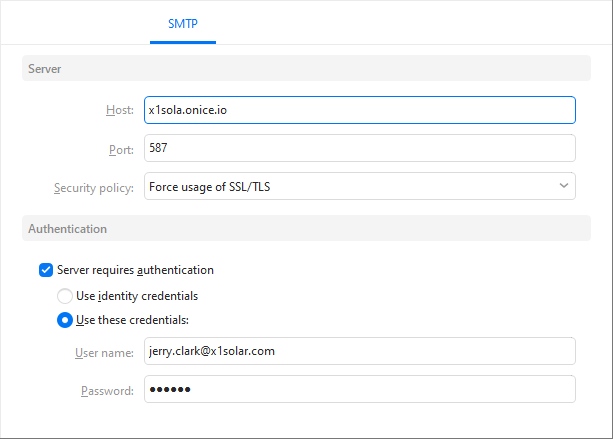
In the Host field, enter the address of your outgoing server.
In the Port field, specify the port number to be used by the SMTP protocol. Default is port 25 . You can read about email protocols in Advanced Information.
In the Security policy field, select a security protocol. Read more about Security Protocols.
Select Authentication method: Use Identity credentials or manually fill in user name and password.
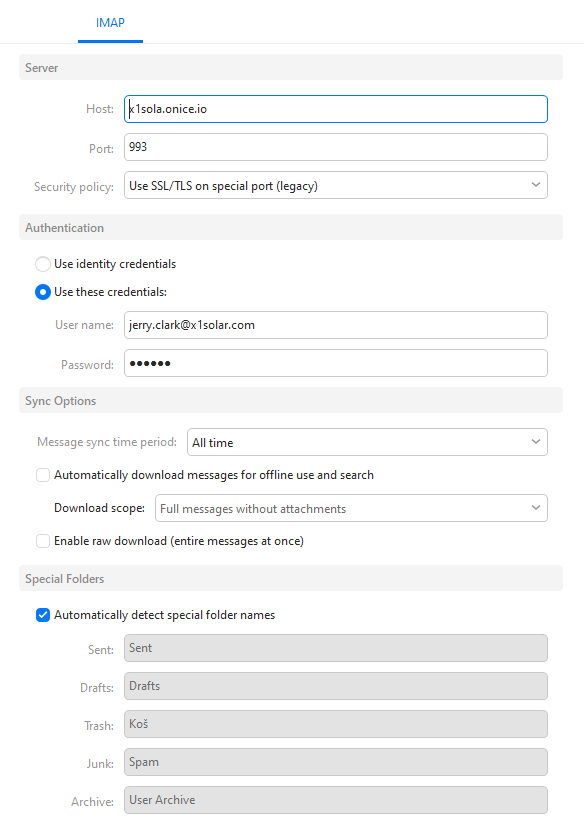
In the Host field, enter the address of your incoming server.
In the Port field, specify the port number to be used for IMAP protocol. Default is Port 143. You can find out more information on Email protocols in Advanced Information.
In the Security policy field, select the type of security protocol the server uses. For more information, check out Security Protocols.
Select Authentication method: Use Identity credentials or manually fill in login name and password.
You can select Download messages for offline use to download email messages to your computer when you are connected to the internet, making the emails fully readable when you work offline.
Checking the option Include attachments and images will download not only the messages but also the attachments and images for use while offline.
By checking Automatically detect special folder names the folder names for incoming emails will be detected automatically. You can also enter your custom settings into the following fields: Sent, Draft, Trash, Junk.
Sync Options
Message sync time period:This setting allows you to synchronize only the newest emails from your server with a custom-set time frame. You can change the time frame here at any time.
The default option is to synchronize messages from All time, which will pose no limit on your messages, all the ones on your server will be synchronized with eM Client. In case you want to keep only the latest in the app, you can choose from Last 1 day, Last 3 days, Last week, Last 2 weeks, Last month, Last 3 months or Last year.
Download options allow you to choose if you’d like to download messages so you can read your previously received emails even when you’re not connected to the internet (you will still need to reconnect to the internet in order to receive new messages) and you can choose if you’d like the search option to also work for your email attachments.

In the Host field, enter the address of your incoming server.
In the Port field, specify the port number you want to use with the POP3 protocol. Default port number is 110. You can find more information on email protocols in Advanced Information.
In the Security policy field, select the type of security protocol you wish to use. Find out more about Security Protocols.
Authentication - select between using your account credentials, or manually filling in the user name and password.
Leave a copy of messages on the server - eM Client will keep a copy of your emails on the server after downloading them into your computer.
Remove from server after x days - when checked, eM Client will remove your emails from the server after a specified number of days after they are downloaded to your computer.
Remove from server when deleted from "Deleted" folder - your emails will be removed from the server when you delete them from the Deleted folder.
Tip: For POP3 Email users, it is safer to have the "Leave a copy of messages on server" box checked. Make sure that you check the space left in your mailbox from time to time.
You can learn more about email protocols in chapter Email Protocols.
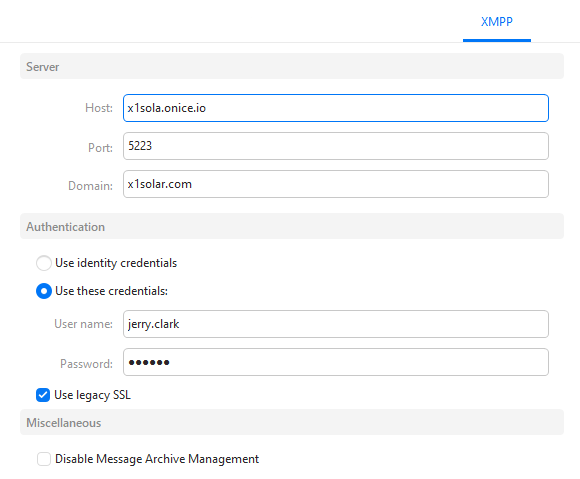
Server
In the Host field, enter the address of the XMPP host server.
In the Port field, enter XMPP service port value, you wish to be used. Default XMPP service port value is 5222.
Authentication - Select between using your identity credentials, or manually filling in the user name and password.
Check in SSL (Secure Socket Layer) if you want your messages to be encrypted. This should be checked if you want to keep your data secure.
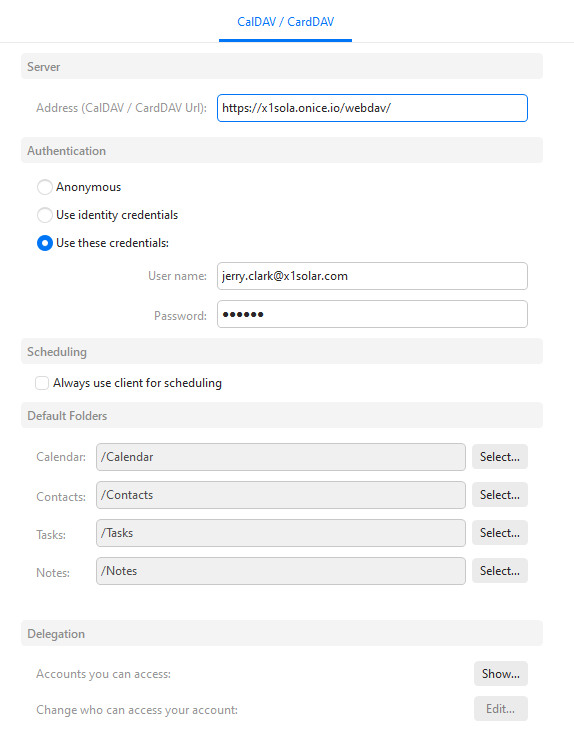
CalDAV is the standard calendar and personal data sharing protocol. Read more about Calendaring Protocols.
In the URL field, enter the CalDAV/CardDAV server address you want eM Client to synchronize your calendar with.
Tip: For Gmail users, the URL address is https://www.google.com/calendar/dav/[email protected].
Select a method of Authentication - Anonymous or manually specify login name and password.
Select the default calendar to which mail invitations to Events, Tasks and Contacts will be saved.
This option will enable you to entrust other users with the privilege to share Calendar and Contacts with you. You can specify accounts you can access as well as users who can access your account.
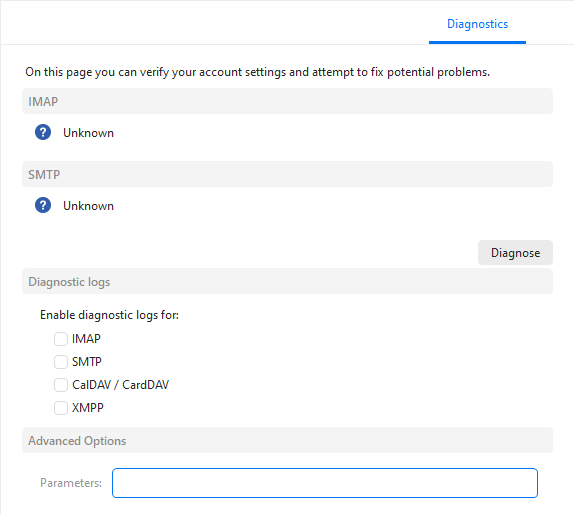
In this section you can troubleshoot your account settings and attempt to fix potential problems with the setup.
The Diagnose button will prompt eM Client to try different Port settings to connect to your server.
Accounts that do not use direct password login will not have the Diagnose option available, as the authentication token is connected to specific settings.
You can also specify for which of the following would you like to enable diagnostic logs: SMTP, IMAP, XMPP, CalDAV / CardDAV.